You may think that it’s very hard to make your own cheese at home, but there are actually quite a few cheese recipes that are very easy. Cheese making has been always an important part of traditional farm cooking. In this article, we will review the many good reasons you should take up cheese making at home. We also share a quick and easy farmhouse cheddar recipe. Read on to learn more.
What You'll Learn Today
Why Make Your Own Cheese?

Making cheese is a rare skill these days but it doesn’t have to be. It’s actually quite simple to make your own cheese, and when you do you’ll have quite a feather to put in your cap. Homemade cheese is always the perfect thing to bring along to potlucks, picnics and parties.
When you make cheese at home, you can always be certain that it’s made with the very best ingredients. Cheese that you purchase in the store is sure to have a number of additives to enhance its longevity, color and/or texture.
Cheese you make it home will have only what you put in it. You will have complete control over the quality of the ingredients you use. If you want all natural, organic, GMO free cheese, you can make just that.
Cheese making gives you an opportunity to not only learn a new hobby but also to learn about where your food comes from.
If you’re lucky enough to live in a farming community, you may be able to strike up a relationship with a local dairy farmer and to know not only the location of your source of milk, but also her name.
Your kids can help you make cheese. It’s an easy safe kitchen activity that teaches responsibility, chemistry and a bit of math. Once your kids have helped you a time or two, they may be happy to receive cheese starter kits as gifts on birthdays and holidays.
Even poorly made cheese is usually very tasty. As you get started, you may not make perfect cheese, but even if the texture seems all wrong, go ahead and drain it and salt it and give it a try. It may be quite delicious! If you can’t eat it as is, you can always use it in cooking.
Practice makes perfect, and the more you try the better you’ll get.
Where Do You Start?

The steps to making all sorts of cheese are fairly similar and fairly easy. Once you’ve learned the basics, you can branch out and make soft cheese, crumbling cheese, hard cheese and more.
When you make your own cheese, you have the best quality product for the lowest price. Start-up with cheese making is inexpensive, and you may already have some of what you need in your kitchen.
Basically, you’ll need a cooking thermometer, a large pot, some clean cheesecloth and a cheese culture.
Here’s a simple recipe to get you started.
Easy Farmhouse Cheddar Recipe
What You’ll Need
To make two pounds of fresh cheddar, you’ll need:
- Two gallons of whole milk. You can use cow’s milk or goat’s milk from the store or raw.
- One packet of direct-set mesophilic starter. Alternately, you can use four ounces of prepared mesophilic starter.
- Dilute half a teaspoonful of liquid rennet (i.e. half a rennet tablet) in a quarter cup of cool, chlorine-free water.
- One tablespoonful of cheese salt.
- Cheese wax or olive oil.
Here’s What You’ll Do {10 Steps}
1. Depending on the type of milk you have, heat it to either 85°F (goat’s milk) or 90°F (cow’s milk). Gradually stir in the starter. Put the lid on the pot and let the milk and starter rest for approximately forty-five minutes.
2. Stir in the diluted rennet using a gentle up-and-down motion. Continue stirring for approximately a minute. Take great care if the milk you are using is fresh, whole cow’s milk. Stir constantly for a full minute with the bottom side of the ladle submerged by about half an inch. This technique will ensure that any risen butterfat gets stirred into the mixture thoroughly.
Put the lid on the pot and keep the mixture consistently warm for forty-five minutes. As above, 85°F is ideal if you’re using goat’s milk, and 90°F is ideal if you’re using cow’s milk. When enough time has elapsed, the curd will break clean.
3. Using a long, sharp knife slice through the curd in a criss-cross pattern about half an inch apart. The end result will be a cubed pattern on the top. See the video below for a demonstration.
4. Put the pot into another large pot filled with hot water. Increase the heat under the pot gradually until the curds’ temperature measures 100°F. This entire process should take about half an hour. The temperature should not rise by more than a couple of degrees every five minutes.
Throughout this process, stir through the curds gently to prevent them from becoming matted. As the curds heat up, they will become smaller. As this happens, the amount of whey (liquid) will increase.
5. Remove the container from the heat, put the lid on and allow it to sit for five minutes. Line a colander with cheesecloth. When the five minutes are up, pour the curds and whey through the cheesecloth. Retain the whey because you can use it in place of milk or other liquids in baked goods. The result is a very light and flavorful product.
6. Tie up the corners of the cheesecloth to create a bag. Hang this bag up in a warm area that is free of drafts. Let the whey drain for an hour.
Put the drained curds into a large bowl and break them into pieces with your fingertips. Add salt.
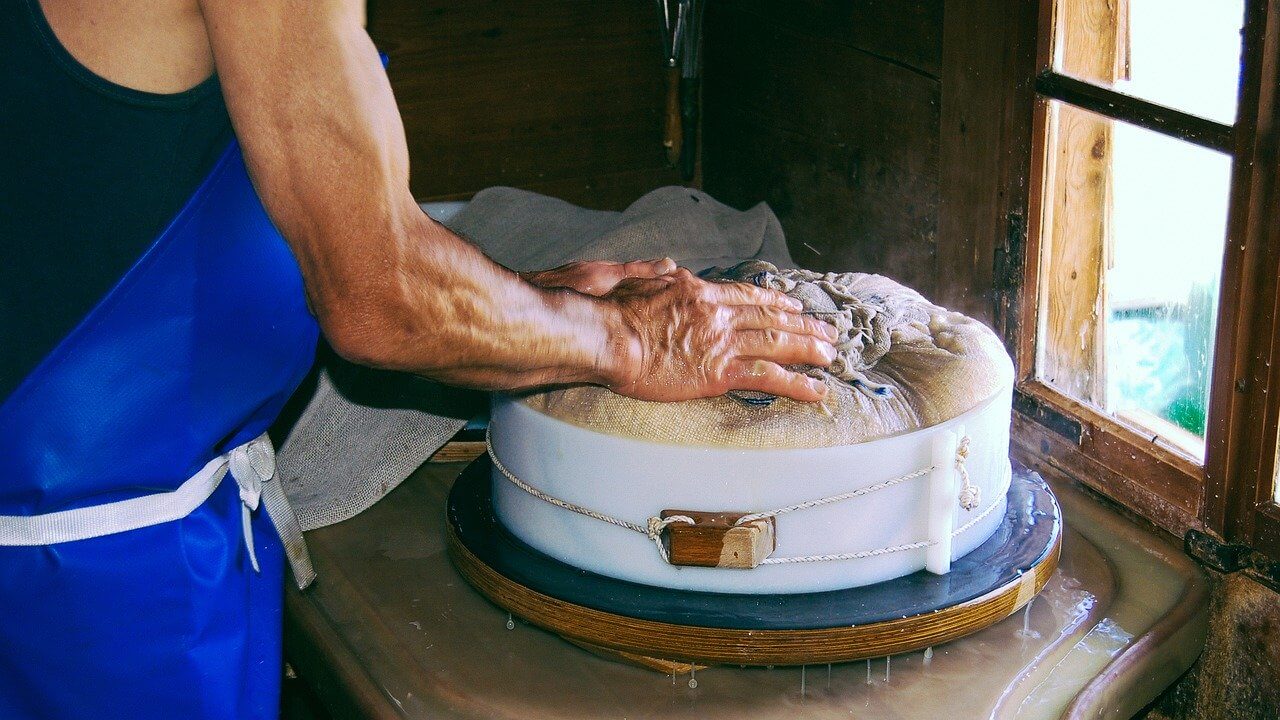
7. Line a mold with cheesecloth and press the curds into it. Fold the cheesecloth neatly over the top of the curds. Put a 10 pound weight on top of this for ten minutes.
8. After ten minutes, tip the cheese out of the mold and peel the cheesecloth away. Turn the cheese over, wrap it in fresh cheesecloth, put it back in the mold and put 20 pounds of weight on it for another ten minutes. Do this again, but finish up with 50 pounds of weight left in place for twelve hours.
9. Tip the cheese out of the mold, peel off the cheesecloth and allow the cheese to air dry at room temperature until it has developed a rind and the surface is completely dry.
This process may take between two and four days. If the weather is dry, the time will be shorter. Humid weather will cause a longer waiting time. Throughout this process, turn the cheese several times daily so that it will dry evenly all over.
10. At this point, you can coat the cheese with wax, or you can rub it all over with olive oil for protection. Allow the cheese to age for a month in a warm, dry, draft free setting. Turn the cheese daily to ensure that it dries and ages evenly.
There are so many uses for cheddar in your kitchen. I love to add a bit into my homemade farmhouse soup.
Cheese Making In The Early 19th Century
Looking for more food inspirations? Here is our guide to cooking carp on a farm grill, or even a farm raised alligator.
Seem to be very delicious. I’ll try this and hope my kids will like it.
What do you mean by rind?
The hard outside skin
I made a starter culture by soaking 1/4 tsp (1 pouch) of store-bought mesophilic powder in 1 litre milk. I then removed 2 table spoons of the fresh prepared culture (1 ice cube amount) and dehydrated it. I ended up with 1 tsp of mesophilic powder. Your recommendation of 4 oz fresh starter is equal to 6.4 tbsp which is equal to approx. 3 tsp homemade mesophilic powder. I’m wondering if my homemade mesophilic powder is weaker, the same, or stronger than the store bought mesophilic culture. I’d hate to use 3 tsp powder to match your recommended 4 oz liquid/fresh and have it be too strong. 1 pack of store bought mesophilic culture contains approx. 1/4 tsp of powder. Hmmmm any ideas?
Make sure your cheese is ultra-dry before waxing. Mine looked and felt dry after three days, but a tiny crevice that was impossible to see remained moist and caused mold to grow under the wax after one week. I’m going to air dry one full week before waxing on my next attempt.
Hi Dot,
I didn’t see your answer regarding your homemade starter, but see in this post you talk about waxing. Can I assume you figured it out? What did you do? I did read in one cheesemaking source (can’t remember which one) that said you have to experiment! Also, that commercial starters are consistent every time, whereas homemade ones may not be. What did you do for your cheese?
How warm are you talking about for the aging? Room temp? Cooler? Slightly warmer?
Thank you so much for this article. I have always want to try aged cheese. I have made ricotta, cottage cheese and fresh mozzarella. They were so much better than store bought. You have inspired me to try. I was intrigued by one of the letters that you could save and dehydrate some of the starter so you wouldn’t have to continually buy it.
How long will this cheese last in the fridge after making it?