Growing mediums are typically soil-based, but there has been a rise in popularity for growing crops in soilless mediums. This is why you’ll see so many articles and videos recommending “hay-bale gardening”, which is actually a misnomer. Hay is foodstuff or horses, cattle and other livestock. It is expensive, and it’s full of seeds, so it is not your best choice for this type of project. What you want is straw, which is intended as bedding for livestock. It’s less expensive, and it’s not going to sprout and grow grass alongside your plants when you use it as a base for your tomato garden. While we may use the popular term “hay bales”, don’t be confused. In this article, we provide a complete guide and handy video to help you grow your tomato plants in straw bales.
What You'll Learn Today
- How To Grow Tomatoes In Hay Bales
- Frequently Asked Questions
- How Do You Fertilize A Straw Bale Garden?
- How Often Do You Water A Straw Bale Garden?
- How Long Does A Straw Bale Garden Last?
- Why choose straw bale gardening over traditional soil based gardening?
- How big should straw bales be for gardening, and how much should you expect to spend per bale?
- Can straw bales bring disease and pests to my garden?
- What type of straw is best for straw bale gardening?
- Should you just set the straw bales on the ground in the area where you want your garden?
- How can you keep straw bales from shifting or falling apart?
- What’s the best way to water a straw bale garden?
- Can you set up your straw bale garden as soon as you bring the bales home?
- Do you plant right into the straw bale?
- Is it hard to take care of a straw bale garden?
- Tomatoes & Hay: Who Knew?
How To Grow Tomatoes In Hay Bales
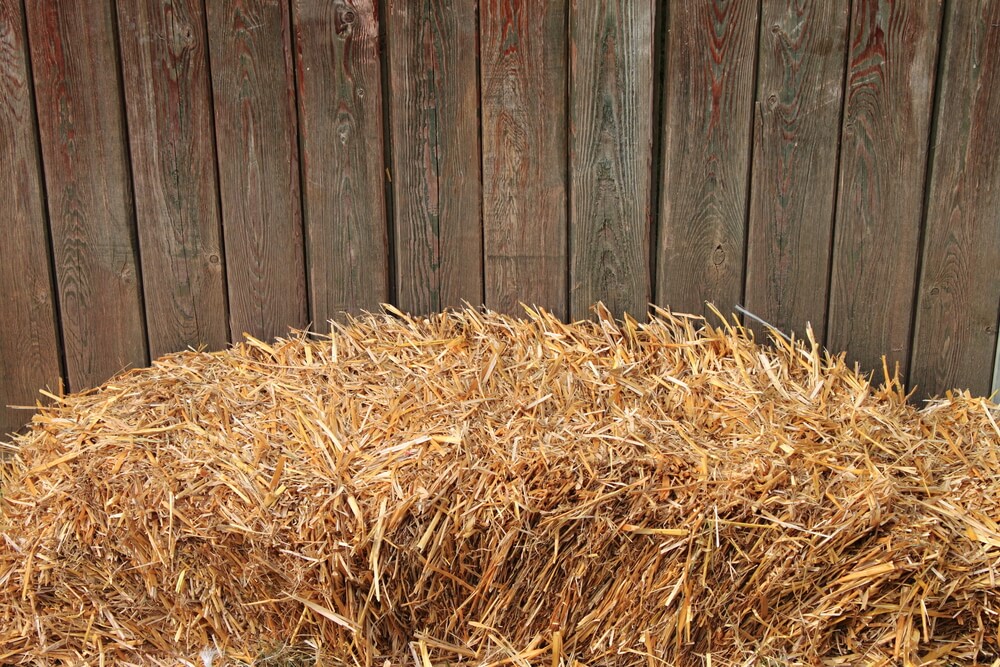
1. Preparing Your Hay Bale
Unfortunately, growing tomatoes in a bale of hay aren’t as simple as planting it and reaping the rewards. The bales must be conditioned before being usable as a garden medium.
First, you have to choose a good location for the hay bale. Once you place it and start to condition it for planting, it will be much too heavy to move. Pick a location that gets upwards of 6 hours of sunlight per day.
Put a layer of cardboard or a couple of layers of paper under the location of the hay bale to stop weeds from growing into the bale itself. Place the hay bale on top of the weed barrier.
Now, how do you prepare hay bales for planting?
Well, conditioning the hay bale will allow for optimal growing conditions. It’ll require daily watering and a high-quality organic fertilizer that is rich in nitrogen every other day.
Composted chicken manure, blood meal, and feather meal all work well.
Here is the schedule:
- On day one, water the bail thoroughly until the water is running out the bottom.
- One day two, sprinkle about 3 cups of the organic fertilizer on top of the bail and water it in with as much water as you used the day before.
- Repeat this cycle for the first week.
- In the 2nd week, keep this same cycle but reduce the organic fertilizer by half.
- On day 14, sprinkle a balanced organic fertilizer or finished compost on the hay bale as the immediate nutrients for the transplanted tomatoes.
This schedule puts the composting process into overdrive and makes the hay bale heat up quickly and then cool down to be optimal for planting.
The composting will continue through the growing season and help feed the tomatoes.
2. Choosing Your Tomato Seedling
While tomatoes can be grown from seed, they do best when transplanted as established seedlings. There are 3 types of tomatoes that you can plant:
- Non-determinant
- Determinant, and
- Dwarf.
Determinate and dwarf varieties will be better suited for hay bale gardening. While non-determinant can thrive in a hay bale, they require high trellises that may be harder to secure in or around the bale.
Determinate and dwarf varieties will work well with a simple cage that is easily attached to a post that is secured through the hay bale.
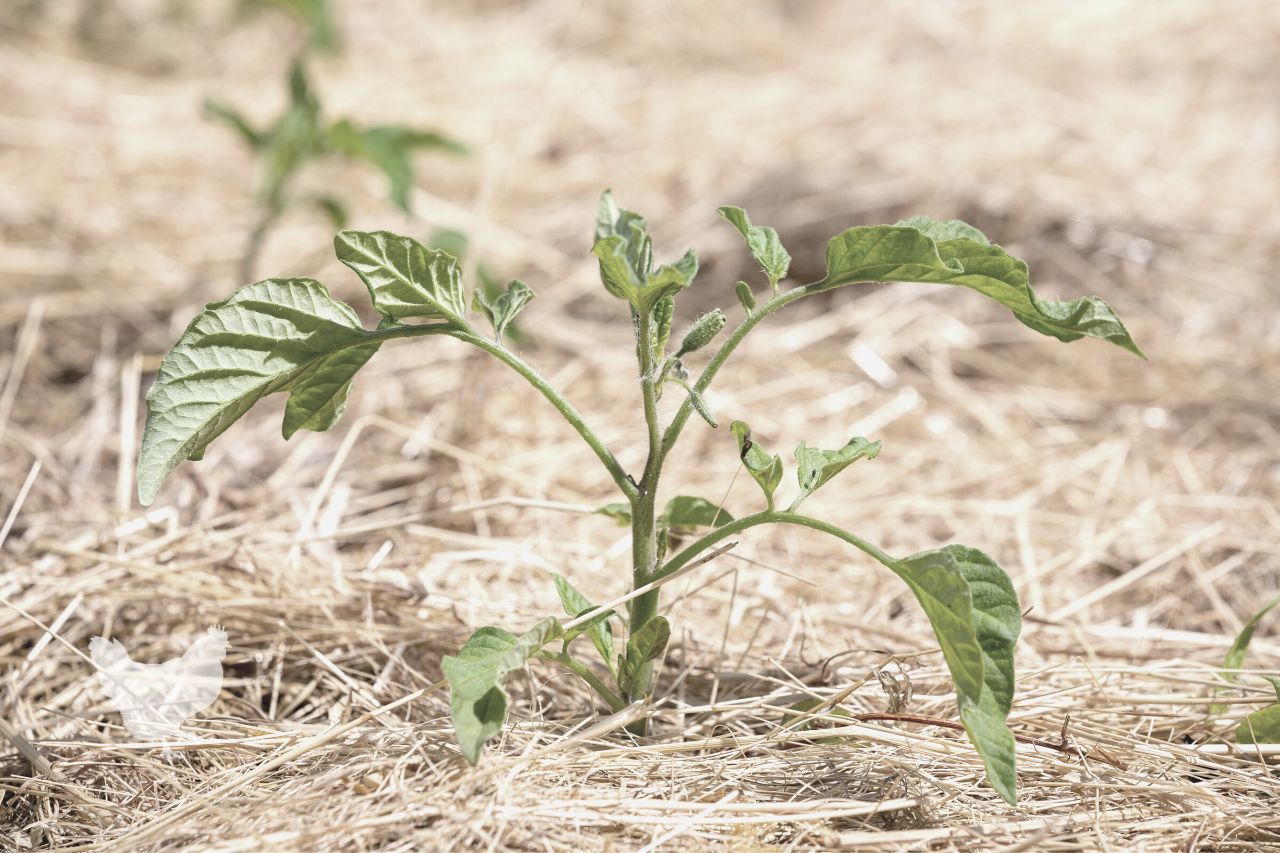
3. Transplanting To The Hay Bale
To transplant a seedling into the hay bale, dig a little trench in the bale. You can fill this trench with aged compost to help feed the plants and provide a stable medium for young roots.
Then, get your seedling out of its container and place in it the trench and cover the root area to create a small mound.
Two tomatoes plants do well in a hay bale, although you can stick with one if you choose a larger growing variety.
Once transplanted, thoroughly water the plant to soak the roots and help form a bond between the roots and the compost in the trenches.
4. Growing & Fertilizing Your Tomatoes
Growing your tomatoes in a hay bale is essentially the same as growing in soil. There are quite a few benefits and one large drawback.
The benefits of growing tomatoes in a hay bale are:
- Less weed pressure, especially when you have a high-quality bale that includes few weed seeds.
- Less pest pressure since many of them live on weeds or in the soil.
- Less disease pressure since the majority of them are a result of soil issues.
- The bale composts in place, feeding the current plants and making for a rich garden bed for successive seasons.
The one drawback of hay bale gardening is that the hay bale will dry out much faster. This means that irrigation will be the main focus throughout the growing season.
Installing drip irrigation or a soaker hose running on top of the hay bale is a good way to ensure proper watering. You may have to water every day if the days are hot and sunny.
With all of this extra watering, nutrients will leach out of the hay bales quickly. Regularly applying a balanced organic fertilizer once a week is the best way to avoid nutrient deficiencies.
The growing season won’t be disrupted by hay bale gardening. Time to maturity and yield should be just as they should be!
5. Harvesting Tomatoes
Choosing determinant and dwarf varieties mean the tomato plants will put off their large yield and then die. Once they die, you can place both the plants and the hay bale in the compost pile.
Or, you can leave the composting hay bale in place and let it finish to create high-quality soil for an in-ground bed in future growing seasons.
Read also this guide to make sure birds do not spoil your harvest.
Frequently Asked Questions
How Do You Fertilize A Straw Bale Garden?
Sprinkling an organic fertilizer on top of the hay bale and watering it in works well. Or, you can use a water-soluble fertilizer and water it in that way. Regular fertilizing is required for optimal growth and crop yields.
How Often Do You Water A Straw Bale Garden?
You have to water more often than a soil-based container. You may have to water every day. Monitoring the moisture levels and the plant health will tell you when you need to water. Hot and sunny locations will make irrigation needs higher.
How Long Does A Straw Bale Garden Last?
Most straw bale gardens will only last one growing season. Some may last for two growing seasons if the crops aren’t long-growing crops. After that, they will be composted and providing high-quality nutrients to the soil below or providing more mass to your compost piles.
Why choose straw bale gardening over traditional soil based gardening?
Straw bale gardening is a great way to get started with gardening or to expand your established garden. Setup is inexpensive, and you can grow a lot of produce in a very limited amount of space. If you need to relocate your straw bale garden, you can. If you have mobility issues (e.g. if you have trouble stooping and bending or if you use a wheelchair) straw bale gardening provides easy accessibility. At the end of the growing season, it’s easy and thrifty to use the straw bales as winter mulch or to compost them to make rich, fertile soil.
How big should straw bales be for gardening, and how much should you expect to spend per bale?
Bales measuring 3′ x 2′ x 1.5 are a good size for this sort of project. They are big enough to provide space for plant growth but small enough to be portable. Generally speaking, a bale of straw costs $5-$7, but sometimes it’s possible to find straw for as little as $3 a bale. Watch local ads, and sign up for notifications from straw and hay providers on social media sites.
Can straw bales bring disease and pests to my garden?
Yes, it’s important to inspect bales of straw before bringing them home. Don’t accept any that show signs of mold or mildew. If you see ants or other creepy crawlies in the straw, don’t bring it home.
What type of straw is best for straw bale gardening?
Wheat straw is typically considered best for use as a mulch and for straw bale gardening. Wheat straw consists of wheat stalks that are left over after the grain has been removed. If wheat straw is not available, you could use oat, rye, barley or buckwheat straw. Just be sure there are no grain or weed seeds in the straw.
Should you just set the straw bales on the ground in the area where you want your garden?
No, you’ll need a weed blocking foundation under the bales. Place them on concrete or gravel or an area where the soil has been worked and weeds removed. Putting a thick layer of cardboard and/or newspaper under the bales can also help block weed growth. It is also possible to raise the bales off the ground and provide better air circulation by placing them on pallets.
How can you keep straw bales from shifting or falling apart?
You can provide a structure of stakes (e.g. rebar) around the straw bales to provide them with stability and keep them in place.
What’s the best way to water a straw bale garden?
Drip irrigation is best for straw bale gardening. Use soaker hoses draped over and around the bales. Add a timer for a set-it-and-forget-it watering system. If you aren’t able to do that, or if you just have a bale or two, you can use large plastic jugs with pinholes poked in them to slowly water your straw bale garden.
Can you set up your straw bale garden as soon as you bring the bales home?
No, you’ll need to condition the bales for several days before planting. Get them situated where you want them and then provide regular watering for three days. On the fourth day, give them a treatment of dolomitic lime mixed with either blood meal, ammonium sulfate or urea. Water the treatment into the straw to help promote composting. Repeat this treatment daily (reducing the amounts of fertilizer daily) for five more days. On the tenth day, provide a treatment of complete, balanced fertilizer. Let the bales settle and compost for two or three weeks, water daily. When the bales are no longer hot inside (below 99 degrees Fahrenheit) due to the composting process, you can begin planting.
Do you plant right into the straw bale?
No, you’ll need to add some good garden soil. If you are starting seeds, spread a thick layer of good soil over the tops of the bales. If you are transplanting into the bales, create an opening (i.e. hole, pocket or divot) in the bale. Fill it with garden soil and add your transplant.
Is it hard to take care of a straw bale garden?
It is not harder than taking care of a traditional garden and may be a bit easier. You’ll need to water regularly, inspect your plants and growing medium for pests and disease often and maintain overall good garden hygiene by pruning as needed and disposing of pruned, broken and/or diseases plant limbs promptly and correctly. Overall, with a good Integrated Pest Management (IPM) plan in place, you should be able to care for a straw bale garden quite easily.
Tomatoes & Hay: Who Knew?
Hay bale gardening is a great way to escape heavy weed, pest, and disease pressure. You don’t have to worry about poor soil quality.
By the end of the season, you have gotten a great tomato harvest and created high-quality compost to use for other crops!
If you want to learn about other growing methods, check my guide about growing tomatoes indoors.
This guide is very useful. Thank you for your effort.
Thank you!
You folks need to learn the difference between a bale of straw and a bale of hay. Straw produces a good medium with few or no weeds. Hay will produce hundreds of weeds which defeats one of the good reasons to plant in a bale. The bale pictured is straw, not hay as described.
You are absolutely right! Aside from your own good points, there is also the fact that straw costs a great deal less than hay, and hay is somebody’s dinner!