Medlar is an ancient fruit related to quinces, apples, and pears. They grow in a wide range of climates and soil types and produce fruit in late autumn. Due to the fruit’s high pectin content, they are ideal for turning into a delicious jam or jelly. In our step-by-step medlar fruit jam recipe, you’ll discover just how easy it is to make this old fashioned delight.
What You'll Learn Today
Is It A Jam Or A Cheese?
It may seem odd to refer to cooked fruit as a cheese, but in fact, when you boil up fruits with water and sugar and then pass them through a strainer you’re making fruit cheese, this is also usually combined with egg yolks, just like when you’re making lemon curd.
When turning medlars into a jam you just place the entire fruit, whole, into the pan, no peeling or removing of pips is needed. This is because once cooked the resultant puree needs to be strained through a sieve.
To make a medlar fruit jelly, rather than smooshing the medlars up into a pulp, you leave them to cook down without too much interference before straining them through a muslin cloth or cheesecloth.
The result is a much clearer product without any bits in it.
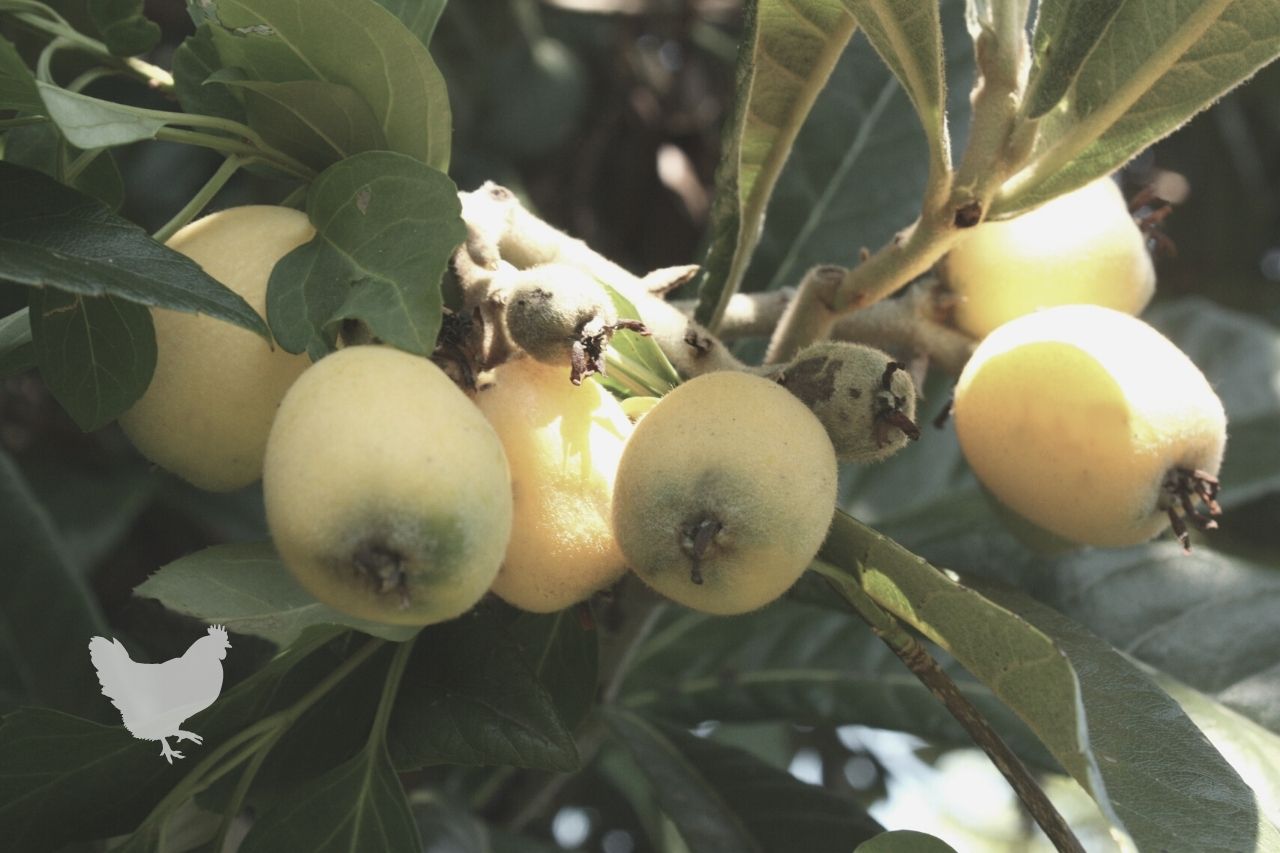
Medlar fruits have had something of a revival in recent decades and new, larger varieties such as Giant and Macrocarpa are becoming readily available.
You may find medlar fruits in farmers’ markets, but they don’t appear in stores. In most places, it is easy enough to grow a medlar tree in your yard. They are fairly small trees and are quite hardy and easy to cultivate.
How To Harvest Medlar Fruits?
Medlar fruits are ready to pick in the late autumn once the leaves have already fallen from the tree.
Bletting Your Medlars
Frost is actually beneficial to medlars as it helps with the bletting process. Bletting is necessary to make the fruits soft and ripe enough to eat and it involves allowing the fruits to partially rot in a controlled way.
Once harvested, medlars should be stored somewhere cool and dry to complete the bletting process. They need to shrivel up slightly, turn a darker shade and become squishy. This can take several weeks, depending on how ripe the fruits were when they were picked.
To blet the medlars simply stand them on some newspaper in a solid bottomed box or crate with their star-shaped top facing upwards. If you can, try not to let them touch each other, but give them a little space between each.
Check them every week to see if they have changed color and are starting to become soft to the touch and ooze a sweet, clear, golden color liquid from the top, this will indicate they are ready.
Medlar Names And Popularity
Before sugar was available in parts of ancient Greece and Italy, bletted medlars would have been eaten during the winter months as a sweet treat.
Many famous writers mention medlars in their works, including Shakespeare, Chaucer, and de Cervantes. In the French language, medlars are commonly called cul de Chien, meaning “dogs butt” which gives a rather graphic and un-poetic imagery to them.
William Shakespeare didn’t do much better when he referred to them in Romeo and Juliet as “open arse” the reason being the top of the fruits has a circular crown shape with an indented central section.
The popularity of medlars has rallied and waned several times over the centuries. They enjoyed a revival in popularity in Victorian England when wealthy British subjects would make medlar jellies and also alcoholic liquors from them as part of their traditional Christmas celebrations.
Can You Buy Medlar Fruits At The Store?
You won’t find medlars in your local store because they aren’t really suited to store practices.
They are picked in late autumn through to early winter when they turn a brownish-yellow as this indicates they are mature. Once bletted, the color will change to a deep reddish-brown.
If you grow your own medlar tree, you can wait until November when the color is turning from brownish-yellow to reddish-brown. That way you won’t need to store them for so long before they are good to eat.
Removing Your Medlars From The Tree
Usually, you’ll need to cut your medlars off by clipping the stork just above the star-shaped top where they attach themselves to the tree. Use a sharp pair of pruners to do this.
Handle them gently, as you don’t want them to bruise as this will cause them to turn bad and mold when you’re bletting them.
It’s fine to eat them raw once bletted, just squeeze the bottom of the fruit and the sweet sticky inner will squish out. Discard the pips and skin. The taste is a little like a stewed pear, or apple.
In this article, we’re more interested in turning our medlars into a fruit jam.
This video shows you how to make medlar jam:
Medlar Fruit Jam Recipe
Because of the time of year that medlar fruits ripen, they make a natural choice for a conserve that is eaten during the December holiday celebrations.
Equipment
- A heavy-based jam pot, or just a regular heavy-based pot is fine
- A long-handled wooden spoon
- A coarse mesh strainer
- Jam jars or preserving jars
- Jam funnel or heatproof jug
- Ladle
- Metal spoon placed into the freezer
Optional extras
- Jam covers
- Lables – to record product name and date it was made
Ingredients
- 2 ¼ lbs. Bletted medlars
- 2 lemons
- 1 ¾ lbs sugar
- ½ teaspoon ground cinnamon (optional)
- ½ teaspoon vanilla or vanilla essence (optional)
- Water to cover the medlars
Instructions
There are several processes you will need to go through to create your jam.
Process 1. Sterilization
If using jars that have been used before, give them a good wash in hot, soapy water and rinse thoroughly. Don’t forget to wash the lids too.
Put the jars and lids into a large pot and cover them with water.
Bring the pot to a boil and simmer for several minutes to sterilize the jars. Place some metal tongs into the boiling water for the last minute or two.
Using the tongs (remembering that the metal will be very hot) remove one jar at a time from the water. Drain out the liquid inside, and place them on a clean kitchen towel to dry.
Do the same with the lids.
Alternatively, you can place all of your jam-making items that won’t melt, such as the jars (providing they don’t have any plastic or rubber components) into a hot oven for 5 minutes to sterilize them.
Once they are done just switch off the oven and the jars and other items will cool while you make your jam.
Sterilization of jars and equipment is essential to prevent mold and bacteria from colonizing your jam and making it bad to eat.
Process 2. Preparing Your Medlars
Before the medlars can be used to make jam, you need to prepare them.
- Wash the medlars thoroughly and place them into the pot.
- Cut the lemons into quarters and place them into your jam pot with the medlars. Now add the water and optional cinnamon.
- Bring to a boil and then turn down to a simmer. Cook the medlars until they turn soft and squishy. Stir them regularly to ensure they are not sticking to the bottom of the pan and mash them up with your wooden spoon.
- After about 30 to 45 minutes your medlar goo should be very soft and pulpy. Switch off the heat.
- Carefully, use your large mesh strainer and the back of your wooden spoon to strain the fruit. This removes the outer skins and the seeds.
- Discard the skin and seeds and return the strained puree back into your jam pot.
- Now add the sugar and slowly bring the mixture back up to the boil, then turn it down to a gentle simmer, remembering to stir regularly until the contents of the pot have reduced by around a quarter to a half, depending how thick you like your jam.
- Take your metal spoon from the freezer and immediately drizzle some of your jam over the back of it. After a minute push your finger up through the drizzle of jam. It should wrinkle up, if it does, the jam is ready, if not simmer for a little longer and try again.
- As soon as the jam is ready, carefully ladle or funnel it into your sterilized jars and seal them, using a towel to hold the jar, while the jam is still really hot. If you are using jam jars with metal lids this will help to activate the vacuum seal. It helps if the jars are still warm too.
Conclusion
Medlar jam makes a wonderful seasonal gift. It can be used to accompany meat and vegetables, or as a topping for toast or croissants or my favorite with some mature cheddar cheese and cut rounds of fresh, crusty French style baguette.
Medlars are an easy fruit tree to grow and are good if your yard is not particularly large.
You can read more articles about medlar trees and many other varieties of fruit trees on our website.
The video said to cook the medlars for 20 minutes, whilst the typed instructions state 30 – 45 minutes. Which is correct?