Grafting is a fascinating horticultural technique that has been practiced for centuries, enabling gardeners to propagate and cultivate fruit trees with desired qualities. Quince is a prime candidate for grafting due to its compatibility with various other fruit-bearing trees. Here we will delve into the art of grafting a quince tree, while exploring the question of its feasibility and detailing various grafting methods, such as whip and tongue grafting, cleft grafting, and bark grafting. Novice and experienced gardeners alike, discover step-by-step instructions on managing the grafting process effectively.
What You'll Learn Today
Can Quince Be Grafted?
Grafting is used to propagate fruit trees, including quince (Cydonia oblonga). There are various methods, each with their own unique advantages and challenges.
Below, we will explore three common grafting techniques: whip and tongue grafting, cleft grafting, and bark grafting. But before we begin let’s first familiarise ourselves with common grafting terms and their meanings:
- Grafting – This is a horticultural technique where a part of one plant (the scion) is attached to another plant (the rootstock) in such a way that they grow together as a single plant.
- Scion – This is the upper part of the graft, which is usually a shoot or a bud of the desired plant variety that will be joined together with the rootstock to make a graft.
- Rootstock – This is the lower part of the graft, which provides the root system and the stem for the grafted plant.
- Cambium – A thin layer of actively dividing cells located just beneath the bark of both the scion and the rootstock. It is essential for the successful union of the two parts during grafting.
- Graft Union – The point where the scion and the rootstock are joined together. It is crucial for the successful transfer of nutrients and water between the two parts.
- Grafting Tape/Rubber Bands – Flexible materials used to bind the grafted parts together during the healing process.
- Grafting Wax/Sealant – A protective covering applied over the graft union to prevent desiccation and infection.
- Dormant Season – The period of the year when plants are not actively growing, usually in late winter or early spring, which is the ideal time for grafting.
- Incompatibility – When the scion and the rootstock are not genetically compatible, leading to a failed or weak graft.
- Callus – The tissue formed at the graft union as a result of cell division and healing, eventually leading to the fusion of the scion and rootstock.
- Whip-and-Tongue Grafting Tool – A specialized tool used to create the tongue and groove cuts for whip and tongue grafting.
- Grafting Knife – A sharp knife with a narrow, fine blade used for making precise cuts during grafting.
- Topworking – The process of grafting new scion wood onto established trees to change or improve their fruit varieties.
- Rooting Hormone – A substance applied to the scion or the rootstock to encourage the formation of roots and improve the chances of successful grafting.
- Budding Shield – A small piece of bark with a bud used in bud grafting techniques.
Whip and Tongue Grafting
Whip and tongue grafting is a commonly used method for grafting quince trees, especially when the scion (the part to be grafted) and the rootstock have similar diameters.
Materials:
- A sharp grafting knife
- Rootstock – a suitable quince tree or other compatible fruit tree
- Scion wood from a healthy quince variety that you wish to replicate
- Grafting tape or rubber bands
- Grafting wax or a waterproof sealant
Instructions:
Step 1: Preparing the rootstock and scion
Select a healthy rootstock quince tree or other compatible fruit tree with a straight and sturdy stem.
Collect scion wood from a healthy quince variety during the dormant season (late winter or early spring). Choose scion wood that is approximately the same diameter as the rootstock branch you will be grafting onto.
Step 2: Making the cuts
On both the rootstock and scion, make a slanting cut of around 45 degrees right through from one side to the other with a single smooth stroke.
Make sure the cuts on both the rootstock and scion match up together nicely. You can use a small hand plane to smooth them out if they are a bit rough.
Next create a small, vertical, downward cut ⅓ or the way across each slanting cut to form the tongue shape in both the scion and the rootstock.
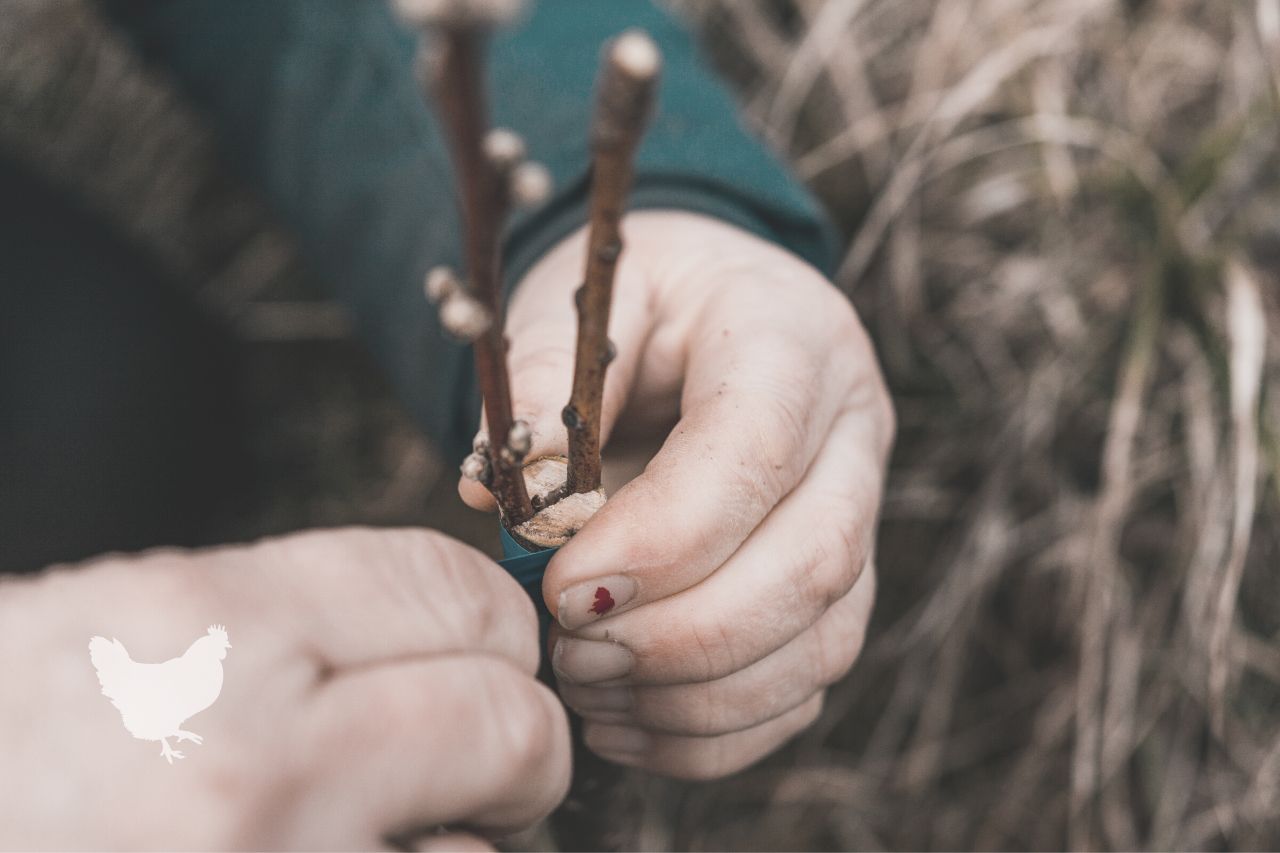
Step 3: Joining the grafts
Insert the scion’s tongue into the rootstock’s tongue, ensuring they fit snugly together without any gaps.
Bind the grafted area firmly with grafting tape and then a strong, cut rubber band to ensure the cambion layers are pushed firmly together. Leaving at least two buds on the scion uncovered and cutting away the top of any excess scion.
Apply grafting wax or a waterproof sealant over the graft union to prevent desiccation.
Step 4: Providing care and monitoring
Ideally, the grafted tree should be in a sheltered location with high humidity to promote successful union.
Monitor the graft regularly for signs of budding and new growth.
Once the graft is established, you can remove the rubber band. If you grafted onto a potted tree, you can gradually expose the tree to more sunlight and outdoor conditions.
Cleft Grafting
Cleft grafting is a useful method for grafting quince trees with a thicker rootstock. Here are detailed instructions for cleft grafting:
Materials:
- A sharp grafting knife
- Rootstock quince or other compatible fruit tree
- Scion wood from a healthy quince variety
- Grafting tape or rubber bands
- Grafting wax or a waterproof sealant
- A hammer and chisel (optional)
Instructions:
Step 1: Preparation of the rootstock and scion
Select a sturdy and well-established rootstock tree.
Collect scion wood from a healthy quince variety during the dormant season, ensuring it is the same diameter as the rootstock.
Step 2: Making your cuts
Create a vertical split or cleft in the rootstock by sawing or using a chisel and hammer. The cleft should be approximately 3-4 inches deep.
Trim the bottom of the scion wood to form a wedge shape that matches the width of the cleft in the rootstock.
Step 3: Inserting your scion
Insert the trimmed end of the scion into the cleft of the rootstock, making sure the cambium layers align.
Step 4: Securing your graft
Bind the grafted area tightly using grafting tape and rubber bands. It is essential that the cambium layers from both the scion and the rootstock are held firmly together.
Apply grafting wax or a waterproof sealant over the cleft and the exposed scion’s surface.
Step 5: Provide care and monitoring
Keep monitoring the graft and look for signs of budding and new growth on the scion.
Once the graft is well established, you can remove the rubber bands and if the tree was potted up rather than grown in the ground, you can gradually expose the tree to more sunlight and outdoor conditions.
Bark Grafting
Bark grafting is suitable for quince trees with thicker bark. Here are detailed instructions for bark grafting:
Materials:
- A sharp grafting knife
- Rootstock quince tree
- Scion wood from a healthy quince variety
- Grafting tape or rubber bands
- Grafting wax or a waterproof sealant
Instructions:
Step 1: Preparation of the rootstock and scion
Look for a quince tree with a sturdy, smooth bark surface to use as the rootstock.
Collect scion wood from a compatible, healthy quince variety while it is dormant and has several buds along its length.
Step 2: Making the cuts
On the rootstock, make a horizontal cut approximately 2 inches long through the bark.
Make a corresponding vertical cut at each end of the horizontal cut to create a “T” shape.
Step 3: Preparation of the scion
Trim the scion wood to a wedge shape with a sloping cut at the bottom.
Step 4: Inserting the scion
Gently lift the bark flaps of the rootstock and insert the wedge-shaped scion underneath them.
Ensure the cambium layers of both scion and rootstock make good contact.
Step 5: Securing the graft
Close the bark flaps back over the scion.
Bind the grafted area firmly with grafting tape and rubber bands.
Apply grafting wax or a waterproof sealant over the grafted area.
Step 6: Care and monitoring
Monitor the graft regularly and look for signs of budding and new growth.
Once well established, remove the bands, and for potted trees gradually expose them to more sunlight and outdoor conditions.
Exercise patience and care during the grafting process and monitor the progress of the graft for successful results.
Can You Graft Quince To A Pear Tree?
Yes, you can graft quince onto a pear tree successfully. Quince (Cydonia oblonga) and pear (Pyrus species) are both members of the Rosaceae family and are closely related, making them compatible for grafting.
Grafting quince onto a pear tree can be advantageous for gardeners who want to utilize the pear tree’s strong root system while enjoying the unique qualities of quince fruit.
When grafted correctly, the cambium layers of both the quince scion and the pear rootstock will unite, allowing the flow of nutrients and water to the scion, leading to successful grafting.
Grafting Techniques for Quince on Pear
Whip and Tongue Grafting:
As mentioned earlier, this technique can be used to graft quince onto a pear. The procedure is similar to grafting quince onto quince or pear onto pear. Ensure that the diameters of the quince scion and pear rootstock are as closely matched as possible for the best results.
Cleft Grafting:
Cleft grafting is another method that can be employed for grafting quince onto a pear tree.
This technique is particularly useful when the pear tree’s rootstock is thicker than the quince scion. The process involves creating a cleft in the pear tree’s stem and inserting the quince scion into it.
Potential Issues:
While quince and pear grafting is generally successful, there are some potential issues to consider:
- Vigor and Growth Rates – Pear trees are typically more vigorous than quince trees. When grafting quince onto pear rootstock, the growth rates of the scion and rootstock may differ. To address this, regular pruning and shaping of the tree may be necessary to maintain balance and ensure both parts grow harmoniously.
- Fruit Characteristics – When you graft quince onto a pear tree, the fruit characteristics may vary.
The quince scion will produce quince fruit, while the remaining pear tree branches will produce pears. This may result in a mixed appearance and different fruit flavors on the same tree.
- Compatibility – While quince and pear are generally compatible for grafting, it is essential to select a healthy similarly sized pear tree rootstock.
Compatibility can vary depending on the specific pear variety and the age of the tree.
- Disease and Pest Resistance – Pear trees may have different disease and pest resistance than quince trees. Grafting quince onto a susceptible pear rootstock may expose the quince scion to potential problems.
It is essential to choose a healthy pear tree with good disease resistance.
What Can You Graft To A Quince Tree?
Quince trees are known for their compatibility with various fruit-bearing trees. As we have seen above, quince can be grafted onto pear rootstock, but the same can be done the other way around.
Here are some examples of what can be grafted to a quince rootstock, along with the advantages and disadvantages:
- Pear (Pyrus species)
- Apple (Malus species)
- Medlar (Mespilus germanica)
- Loquat (Eriobotrya japonica)
Advantages – Grafting pear, apple, or loquat onto a quince rootstock can result in improved disease resistance, a sturdier root system, and the growth of different fruits, with their own unique characteristics, on the same tree.
Disadvantages – While these fruits are generally compatible, there might still be variations in growth rates and fruit quality. Regular pruning and maintenance may be necessary to balance the growth of both the pear and quince branches.
How Do You Grow Quince From Cuttings?
Growing quince from cuttings is a feasible method of propagation providing you follow specific steps and maintain attention to detail:
- Time of Year – The best time to take quince cuttings is during the dormant season, typically in late winter or early spring. This is when the plant is not actively growing, and the cuttings have a higher chance of rooting successfully.
- Age of Cuttings – Choose one-year-old, hardwood cuttings from healthy, disease-free quince trees. The cuttings should be about 8 to 12 inches long and have multiple nodes (the areas where leaves and branches emerge).
Method of Cutting Propagation
Tools Needed:
- Clean, sharp secateurs or pruning shears for taking the cuttings.
- Rooting hormone (optional) to improve rooting success.
- A well-draining container filled with rooting medium.
- Plastic bag or clear plastic dome to maintain humidity.
Step 1: Prepare the Cuttings
Take several healthy quince cuttings with clean, sharp secateurs. Each cutting should have at least 3-4 nodes.
Trim the top end of the cutting just above a bud and the bottom end just below a node.
Step 2: Treating the Cuttings (Optional)
To improve rooting, you can dip the bottom end of the cuttings in a rooting hormone (follow the manufacturer’s instructions).
This step is optional but can increase the chances of successful rooting.
Step 3: Planting the Cuttings
Fill a well-draining container with a rooting medium, such as a mixture of peat moss and perlite or sand.
Insert the prepared quince cuttings into the rooting medium, burying about half of the cutting’s length.
Step 4: Provide Proper Care for the Cutting
Place the container in a warm and sheltered location with indirect sunlight.
Keep the cuttings consistently moist but not waterlogged to promote root development.
Consider covering the cuttings with a plastic bag or a clear plastic dome to maintain high humidity around the cuttings.
Seeing results
Rooting time can vary depending on various factors such as temperature, humidity, and cutting health. In general, quince cuttings may start showing signs of root development within 4 to 8 weeks.
Once roots are established, you can carefully transplant the rooted cuttings into individual pots or directly into the ground in a prepared bed.
Potential problems and troubleshooting
- Fungal Diseases – High humidity can sometimes lead to fungal diseases such as damping-off. Ensure good ventilation and avoid overwatering to prevent fungal issues.
- Rotting Cuttings – Cuttings that are buried too deeply in the rooting medium or left in overly wet conditions may rot. Monitor the moisture level and adjust accordingly to prevent rot.
- Low Success Rate – Not all cuttings will successfully root. Take more cuttings than needed to increase the chances of success.
With proper care, you can successfully grow quince from cuttings and expand your quince orchard with healthy, new plants. Patience and diligence in caring for the cuttings are essential for the best results.
In this video, see some other techniques for successful propagation:
Other Ways To Propagate Quince Trees
There are other methods of propagating quince trees besides grafting and growing from cuttings. Here are two additional techniques for propagating quince:
Layering
Layering is a propagation method where a branch or stem of the parent plant is encouraged to root while still attached to the main plant.
This method can be done in several different ways, but air layering is the most common and effective technique for quince trees.
Air Layering
Materials needed:
- A healthy, flexible branch of the quince tree
- A clean and sharp knife or pruner
- Rooting hormone (optional)
- Sphagnum moss or a rooting medium
- Plastic wrap or a plastic bag
- Twine or plant ties
Instructions:
Step 1: Select a Branch
Choose a healthy and flexible branch that is about the thickness of a pencil. It should be located in a position where it can easily be reached.
Step 2: Make a Cut
Make a horizontal cut on the selected branch, about 6 to 12 inches from the tip. The cut should be about one-third to halfway through the branch.
Step 3: Apply Rooting Hormone (Optional)
If desired, apply rooting hormone to the wounded area to encourage root development.
Step 4: Enclose the Area
Wrap the wounded area with damp sphagnum moss or other dampened rooting medium, and cover it with plastic wrap or a plastic bag to maintain the moisture and hold the medium around the wound.
Secure the covering with twine, plant, or zip ties to keep it in place.
Step 5: Wait for Rooting
Allow the branch to remain enclosed for several weeks to months until you see a strong and active amount of root growth inside the plastic.
Step 6: Cut Off and Pot Up
Once roots have formed, you can carefully cut the branch just below the rooted area. Pot up the rooted section in a suitable container with well-draining soil and provide appropriate care until it establishes itself as a new quince tree.
Division
Division is a method of propagation that involves dividing an established quince plant into smaller sections, each containing roots and shoots.
This technique is suitable for young quince trees being grown in pots that have formed multiple suckers or shoots around the base.
Instructions:
Step 1: Remove the Plant
Carefully remove the quince plant from the pot, ensuring that you get as many roots as possible while minimizing damage to the shoots.
Step 2: Separate the Suckers
Gently separate the individual suckers or shoots from the main plant, ensuring that each section has its own set of roots and shoots.
Step 3: Replant
Immediately replant each separated sucker in its new location either in pots or directly in the ground where you want the new quince trees to grow. Choose a sunny, sheltered spot for the new plants.
Step 4: Water and Care
Water the newly planted divisions thoroughly and provide regular care to help them establish successfully.
Propagation through layering and division allows gardeners to expand their quince collection or replace older trees without the need for grafting or taking cuttings. These methods are relatively simple and can be successful with proper care and attention to detail.
Conclusion
Grafting a quince tree opens up a world of possibilities for gardeners seeking to propagate and experiment with diverse fruit varieties.
It is possible to graft quince onto a pear tree due to its genetic compatibility within the Rosaceae family.
The same grafting techniques used for quince-to-quince or pear-to-pear grafting can be applied. However, keep in mind that there may be differences in growth rates, fruit characteristics, and disease resistance between the quince scion and the pear rootstock.
Careful selection of a healthy and compatible pear tree, regular maintenance, and monitoring can help ensure a successful graft and fruitful results.
Quince trees have great versatility in accepting various fruit-bearing trees as scions.
Grafting other fruit varieties onto a quince rootstock can yield a single tree with multiple fruits, increased disease resistance, and potentially unique fruit characteristics.
However, it is crucial to consider the potential challenges of grafting, such as varying growth rates, fruit qualities, and the need for vigilant pruning and maintenance to achieve a harmonious and fruitful outcome.
Careful selection of compatible varieties and use proper grafting techniques for a successful and rewarding multi-grafted quince tree in your garden.
We hope you now feel ready to embark on a rewarding grafting journey to nurture more quince trees, reaping the fruits of your labor in a thriving and fruitful orchard. Happy grafting!